VSM High Availability is optional but it is strongly recommended in a production environment.
High availability is accomplished by installing and configuring a secondary VSM.
For instructions on how to install and configure a Primary Cisco 1000v VSM on your vSphere environment please follow
configure-vsphere-and-cisco-nexus-1000v-connecting-to-nexus-5k-upstream-switches
Then come back to this post to learn how to install and configure a secondary VSM for high availability.
1) Check the redundancy status of your primary VSM
n1kv# show system redundancy status
Redundancy role
---------------
      administrative:   primary
         operational:   primary

Redundancy mode
---------------
      administrative:   HA
         operational:   None

This supervisor (sup-1)
-----------------------
    Redundancy state:   Active
    Supervisor state:   Active
      Internal state:   Active with no standby

Other supervisor (sup-2)
------------------------
    Redundancy state:   Not present
// Check Modules
n1kv# show module
Mod  Ports  Module-Type                      Model              Status
---  -----  -------------------------------- ------------------ ------------
1    0      Virtual Supervisor Module        Nexus1000V         active *
3    248    Virtual Ethernet Module          NA                 ok
4    248    Virtual Ethernet Module          NA                 ok
5    248    Virtual Ethernet Module          NA                 ok

Mod  Sw               Hw
---  ---------------  ------
1    4.0(4)SV1(3b)    0.0
3    4.0(4)SV1(3b)    1.20
4    4.0(4)SV1(3b)    1.20
5    4.0(4)SV1(3b)    1.20

Mod  MAC-Address(es)                         Serial-Num
---  --------------------------------------  ----------
1    xx-xx-xx-xx-xx-xx to xx-xx-xx-xx-xx-xx  NA
3    xx-xx-xx-xx-xx-xx to xx-xx-xx-xx-xx-xx  NA
4    xx-xx-xx-xx-xx-xx to xx-xx-xx-xx-xx-xx  NA
5    xx-xx-xx-xx-xx-xx to xx-xx-xx-xx-xx-xx  NA

Mod  Server-IP        Server-UUID                           Server-Name
---  ---------------  ------------------------------------  --------------------
1    192.168.10.10      NA                                    NA
3    192.168.16.82       xxxxxxxxxxxxxxxxxxxxxxxxxxxxxxxxxxxx  esx1.example.com
4    192.168.16.53       xxxxxxxxxxxxxxxxxxxxxxxxxxxxxxxxxxxx  esx2.example.com
5    192.168.16.149      xxxxxxxxxxxxxxxxxxxxxxxxxxxxxxxxxxxx  esx3.example.com


* this terminal session
// check HA status
n1kv# show system redundancy ha status
VDC No    This supervisor                         Other supervisor
------    ---------------                         ---------------

vdc 1     Active with no standby                  N/A
2) Install the secondary VSM from the OVF.
Select to Manually Configure Nexus 1000v and just like the primary installation select the right VLANs for Control, Packet and Management.
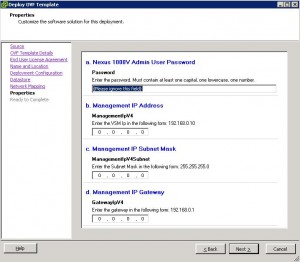
When you get to this properties page:

Do not fill in any of the fields, just click next and Finish
3) Power on the Secondary VSM
The system setup script will prompt for the following:
Admin password // Choose your password
VSM Role: secondary // VSM will reboot
Domain ID: 100 // This must be the same domain ID you gave to the primary, I used 100
Once a VSM is set to secondary it will reboot.
4) Verify VSM high availability
Login to VSM and run:
n1kv# show system redundancy status
Redundancy role
---------------
      administrative:   primary
         operational:   primary

Redundancy mode
---------------
      administrative:   HA
         operational:   HA

This supervisor (sup-1)
-----------------------
    Redundancy state:   Active
    Supervisor state:   Active
      Internal state:   Active with HA standby

Other supervisor (sup-2)
------------------------
    Redundancy state:   Standby

    Supervisor state:   HA standby
      Internal state:   HA standby
n1kv# show module
Mod  Ports  Module-Type                      Model              Status
---  -----  -------------------------------- ------------------ ------------
1    0      Virtual Supervisor Module        Nexus1000V         active *
2    0      Virtual Supervisor Module        Nexus1000V         ha-standby
3    248    Virtual Ethernet Module          NA                 ok
4    248    Virtual Ethernet Module          NA                 ok
5    248    Virtual Ethernet Module          NA                 ok

Mod  Sw               Hw
---  ---------------  ------
1    4.0(4)SV1(3b)    0.0
2    4.0(4)SV1(3b)    0.0
3    4.0(4)SV1(3b)    1.20
4    4.0(4)SV1(3b)    1.20
5    4.0(4)SV1(3b)    1.20

Mod  MAC-Address(es)                         Serial-Num
---  --------------------------------------  ----------
1    xx-xx-xx-xx-xx-xx to xx-xx-xx-xx-xx-xx  NA
2    xx-xx-xx-xx-xx-xx to xx-xx-xx-xx-xx-xx  NA
3    xx-xx-xx-xx-xx-xx to xx-xx-xx-xx-xx-xx  NA
4    xx-xx-xx-xx-xx-xx to xx-xx-xx-xx-xx-xx  NA
5    xx-xx-xx-xx-xx-xx to xx-xx-xx-xx-xx-xx  NA

Mod  Server-IP        Server-UUID                           Server-Name
---  ---------------  ------------------------------------  --------------------
1    192.168.10.10      NA                                    NA
2    192.168.10.10      NA                                    NA
3    192.168.16.82       XXXXXXXXXXXXXXXXXXXXXXXXXXXXXXXXXXXX  esx1.example.com
4    192.168.16.53       XXXXXXXXXXXXXXXXXXXXXXXXXXXXXXXXXXXX  esx2.example.com
5    192.168.16.149      XXXXXXXXXXXXXXXXXXXXXXXXXXXXXXXXXXXX  esx3.example.com


* this terminal session
n1kv# show system redundancy ha status
VDC No    This supervisor                         Other supervisor
------    ---------------                         ---------------

vdc 1     Active with HA standby                  HA standby
VMware recommends that you run the Primary and the Secondary on different ESX hosts.
5) Test VSM switchover
From the VSM run system switchover to switch between the active and the standby VSMs.
That is it, now you have a highly available Cisco 1000v VSM infrastructure.

Comments
Leave a comment Trackback