If you are running your VMware infrastructure on NetApp storage, you can utilize NetApp’s Virtual Storage Console (VCS) which integrates with vCenter to a provide a strong, fully integrated solution to managing your storage from within vCenter.
With VCS you can discover, monitor health and capacity, provision, perform cloning, backup and restores, as well as optimize your ESX hosts and misaligned VMs.
The use case I will write about is the ability to take a back up of all of your production Datastores and initiate a SnapMirror transfer to DR.
Installing NetApp’s Virtual Storage Console
Download the software from NetApp’s website (need credentials) from the software section: VSC_vasavp-5-0.zip (version as of this post)
Install on a Windows System (can be vCenter if using Windows vCenter)
There are currently a couple of bugs with version 5.0 that can be addressed by following the following articles – hopefully they will be addressed soon by NetApp:
http://mysupport.netapp.com/NOW/cgi-bin/bol?Type=Detail&Display=821600
and
http://mysupport.netapp.com/NOW/cgi-bin/bol?Type=Detail&Display=767444
Follow the wizard…
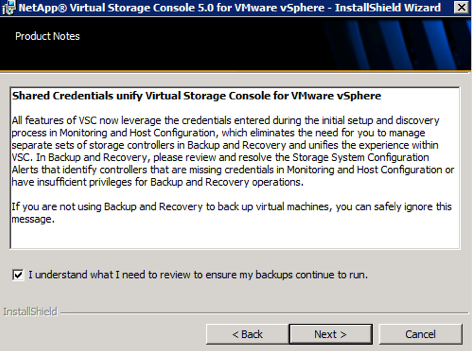
Select Backup and Recovery to be able to use these features


You may get a warning here and this is where you need to follow the bug fixes specified earlier (adding a line to smvi.override)
Then you need to enter the information requested:
Plugin service information: hostname/IP of the server you installed VSC (in this case it was the vCenter server)
Then enter the vCenter information

Check that the registration was successful

Verify that it is installed in the vCenter Web Client

Configure the NetApp Virtual Storage Console form vCenter Web Client
On the vCenter Web Client click on the Virtual Storage Console icon

Click on ‘Storage Systems’ and add your NetApp controllers including your DR controllers ( you will need this to successfully initiate SnapMirror after backups)

Once you have added them, you will be able to see their details and status, take a look at the summary and related objects. Also click on the ‘View Details’ link(s) they will provide a wealth of information about your storage

Go back to the main page of the Virtual Storage Console and you will see global details

With the above setup you can start provisioning storage, create backups/restores, mount snapshots and look at the details of everyobject from a storage perspective. Take a look at the Datacenter, Datastores, VMs.


Configure Datasore Backups followed by NetApp SnapMirror for Disaster Recovery
Pre-requisites:
You need to have an initialized SnapMirror relationship
prod-filer> vol size vm_datastore
vol size: Flexible volume 'vm_datastore' has size 500g.
dr-filer> vol create vm_datastore_snapmirror aggr0 500g
dr-filer> vol restrict vm_datastore_snapmirror
dr-files> snapmirror initialize -S prod-filer:vm_datastore dr-filer:vm_datastore_snapmirror
Create an empty schedule by adding the following line to /etc/snapmirror.conf
prod-filer:vm_datastore dr-filer:vm_datastore_snapmirror - - - - -
Ensure you have added your production NetApp controllers as well as your DR controllers on the vCenter Web Clien Virtual Storage Console
Configuration:
In vCenter Web Client, go to your Datastores view.
(Optional but recommended) Enable Deduplication in your Datastores
// This will save storage and increase the efficiency of the replication because you will only replicate deduplicated data. To do so:
Right click on a Datastore -> NetApp VSC -> Deduplication -> Enable
Right click on a Datastore -> NetApp VSC -> Deduplication -> Start (Select to scan the entire volume)

By default the deduplication process is scheduled daily at midnight, I recommend to have it happen at least 2 hours before SnapMirror replication.
For example:
Deduplication: daily at 8pm
SnapMirror: daily at 10pm
To change the default schedule of the deduplication process per volume you need to do the following on the NetApp controllers CLI:
prod-filer> sis config -s sun-sat@20 /vol/vm_datastore
Schedule the Backup and SnapMirror Update
Right click on a Datastore -> NetApp VSC -> Backup -> Schedule Backup


Add other Datastores to the same backup job (please remember that for SnapMirror Update to work you need to have pre-created the SnapMirror relationship).
Right click on the other Datastores -> NetApp VSC -> Backup -> Add to Backup Job
You will see the already created backup job (10pm_backup), select it and click ok.

At this point, all the Datastores you selected will be Deduplicated, Backed-up and Replication to the DR site.
Restoring on the Prod or DR site
Now that NetApp VSC is setup, backing up a replicating data, we can restore at will from the snapshot.
Restore a VM (entire VM or some of its virtual disks)
Right click on VM -> NetApp VSC -> Restore
Select backup from the list and choose to restore entire VM or just some disks
Restore from Datastore
Right click on Datastore -> NetApp VSC -> Restore
Select backup from the list and choose what to restore
Mount a Snapshot (it will show as another Datastore and you can retrieve files or even start VMs)
Click on a Datastore and go to Related Objects -> Backups
Select Backup, Right-Click and select Mount
You will see the datastore present and mounted to one ESX host, from there you can retrieve files, start VMs, etc.
Once you are done go back to the Datastore and unmount the Backup.

Comments
Leave a comment Trackback